How to Set Up a SpacemiT K3 RISC-V SBC
Set up a SpacemiT K3 Pico-ITX SBC or K3-CoM260 SoM for boot, storage, networking, and OS testing.
Set up a SpacemiT K3 Pico-ITX SBC or K3-CoM260 SoM for boot, storage, networking, and OS testing.
This guide is for embedded developers, board bring-up engineers, and RISC-V enthusiasts who want to evaluate the SpacemiT K3 platform end to end. After following the steps, you will have a powered board or module, a working console, a bootable storage setup, network access, and a first OS login.
It focuses on practical bring-up tasks rather than benchmarks. You will also know what to verify at each stage so you can confirm the board is healthy before moving on to application work, AI workloads, or carrier-board integration.
Before you start
Get the latest AI news in your inbox
Weekly picks of model releases, tools, and deep dives — no spam, unsubscribe anytime.
No spam. Unsubscribe at any time.
- A K3 Pico-ITX SBC or K3-CoM260 SoM kit
- A 12V DC power supply rated up to 65W, or a USB-C power source that supports USB PD
- A display with eDP or USB-C DP 1.2 input, or a serial console adapter for UART
- An NVMe SSD if you plan to use the M.2 Key-M slot
- A microSD card for recovery or alternate boot media
- A Linux host PC for flashing and serial access
- SpacemiT Bianbu 3.0 image or another supported OS image such as Ubuntu 26.04, OpenHarmony 6.0, OpenKylin 2.0, Deepin 25, or Fedora
- Documentation from the vendor and distributor pages for your exact board revision
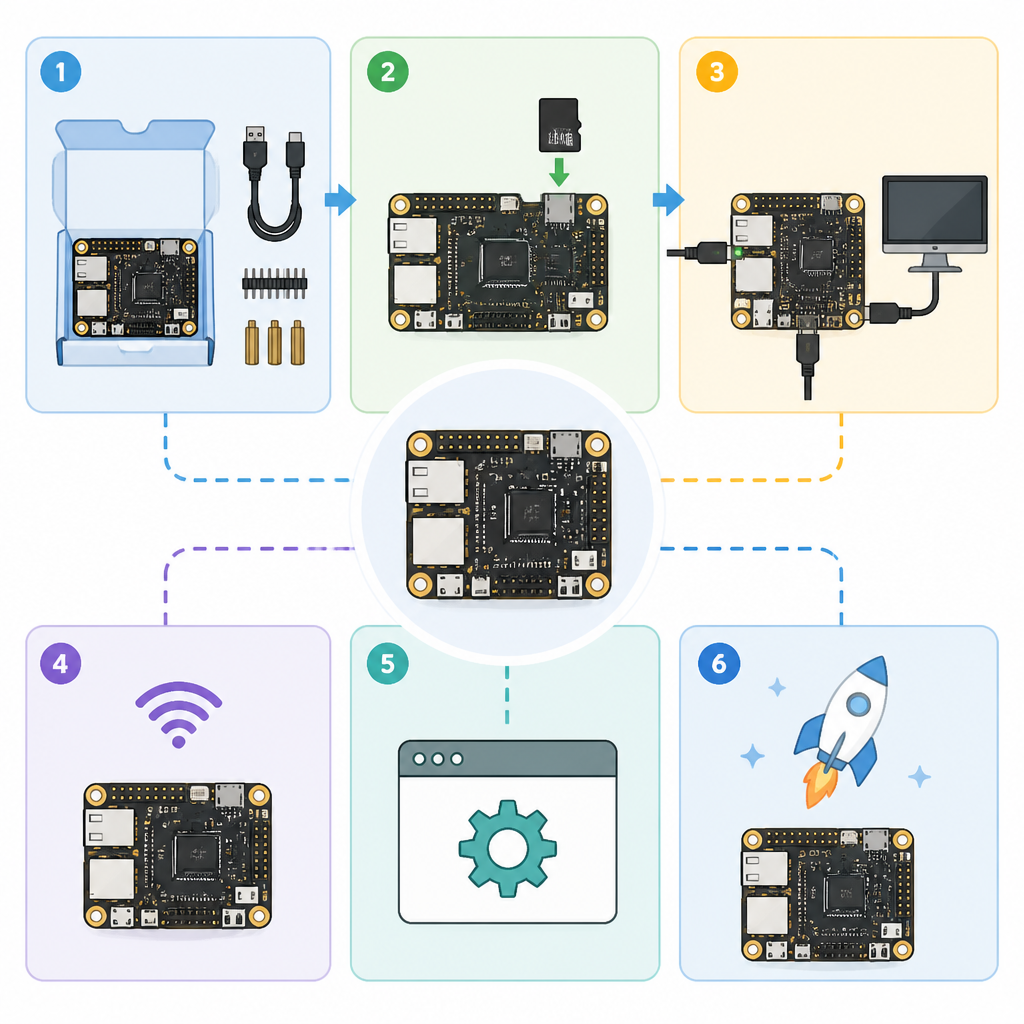
Step 1: Identify your board and connector set
Your first goal is to confirm whether you have the Pico-ITX SBC or the CoM260 module, because the power path, boot media, and display wiring depend on the carrier or board variant. Use the official product pages on SpacemiT and the distributor listings linked from the CNX Software article to match your exact kit, because the SBC and the SoM dev kits are sold in several configurations.
Check the physical labels for RAM size, UFS capacity, and available ports. The Pico-ITX board includes 10GbE SFP+, Gigabit Ethernet, USB-C, USB 2.0 ports, M.2 slots, and debug headers, while the CoM260 is meant to be used with a compatible carrier board.
Verification: you should be able to list the board variant, memory size, storage type, and available debug connector before you connect power.
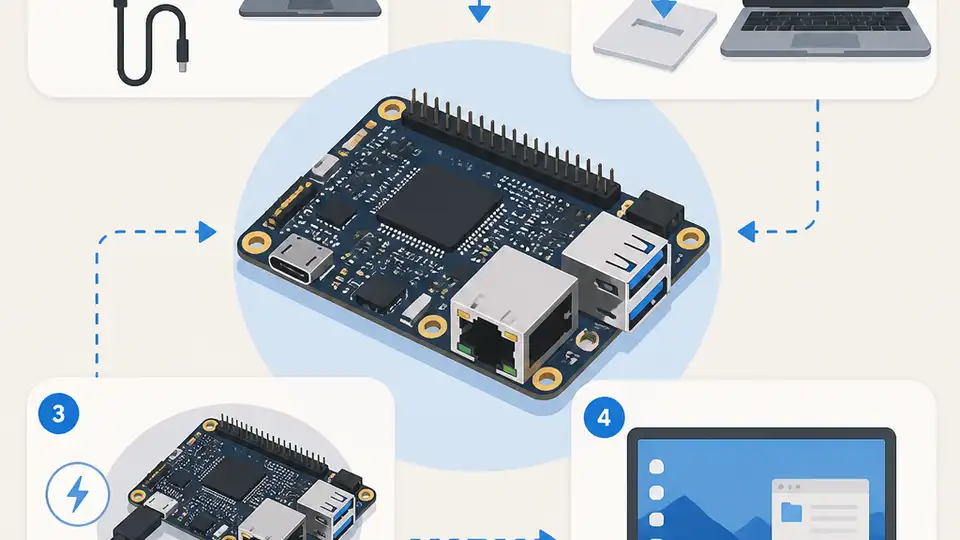
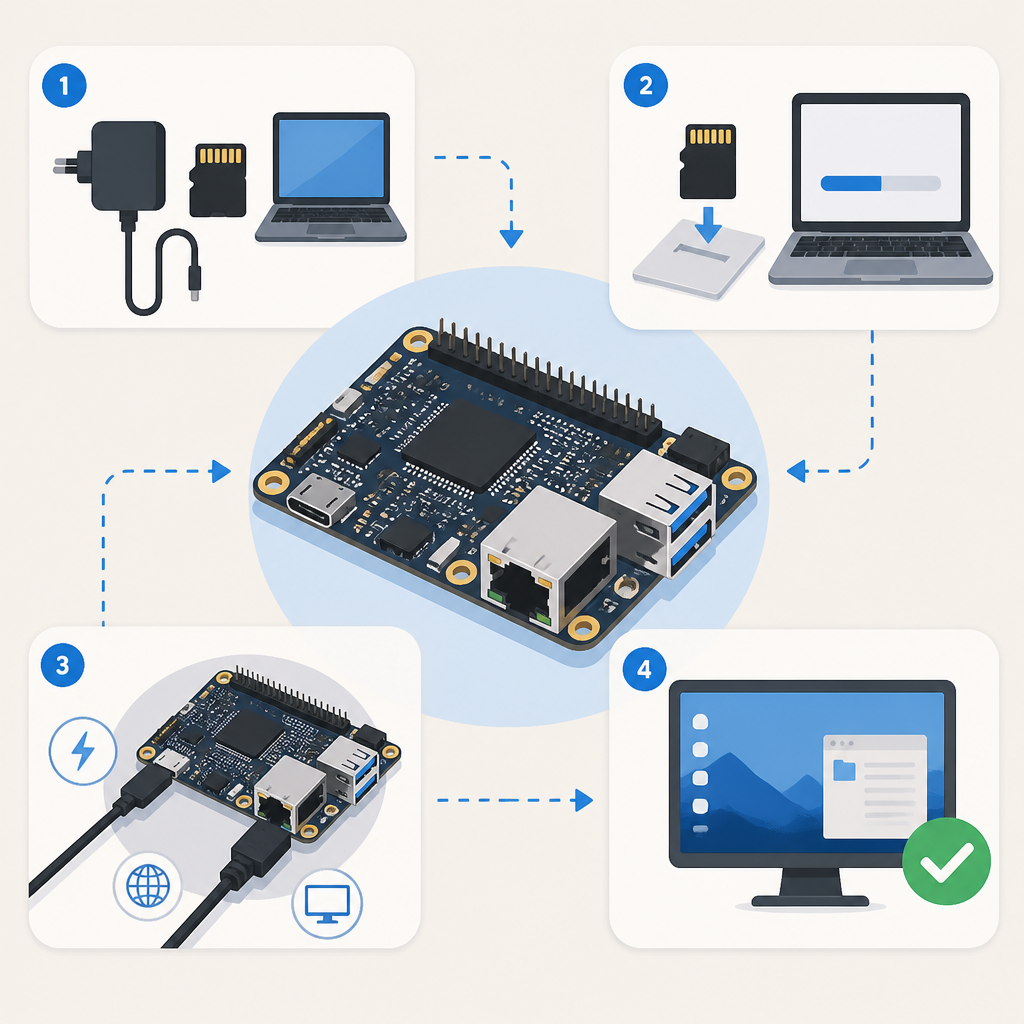
Step 2: Wire power and console access
Your second goal is to establish a safe first boot path. Connect the recommended power input for your board, then attach UART or JTAG only after confirming pinout and voltage levels from the documentation. If you are using the Pico-ITX SBC, start with the simplest setup: power, console, and one display or Ethernet link.
Host PC serial example on Linux:
sudo screen /dev/ttyUSB0 115200

Power example:
- 12V DC input, up to 65W
- or USB-C with USB PD, if your kit supports it
If the board has a fan and heatsink assembly, install it before extended boot tests. The K3 can run at high power envelopes, so thermal contact matters even for short bring-up sessions.
Verification: you should see bootloader output or kernel messages in the serial console within a few seconds of applying power.
Step 3: Flash the boot media
Your third goal is to put a known-good operating system on the board so you can validate storage and boot flow. Start with the vendor-provided Bianbu 3.0 image, since it is the default preload for many kits, and then move to other supported systems after the hardware is stable. If your board boots from UFS, follow the vendor flashing method for that device class; if you are testing recovery, use the microSD slot or NVMe path where supported.
Use the image-writing method recommended by the OS vendor, then safely eject the media before moving it to the board. If you plan to use NVMe, confirm that the M.2 Key-M slot is populated with a PCIe Gen3 x4 drive and that the board firmware is configured to see it.
Verification: you should see the board detect the selected boot device and begin loading the OS without storage errors.
Step 4: Boot Bianbu and confirm hardware bring-up
Your fourth goal is to complete the first successful login and verify that the core hardware is alive. Boot into Bianbu 3.0, then confirm CPU, memory, and peripheral detection with standard Linux tools. This is the point where you check for the K3’s octa-core RISC-V CPU, LPDDR5 capacity, Ethernet links, USB devices, and display output.
Useful checks after login:
uname -a
lscpu
free -h
ip link
lsblk
Look for the expected memory size, the UFS or NVMe device you installed, and the network interfaces you plan to use. If your kit includes WiFi 6 and Bluetooth 5.2, confirm the wireless device appears in the system log or network manager.
Verification: you should have a desktop or shell prompt, with CPU, RAM, storage, and at least one network interface visible.
Step 5: Validate expansion and OS compatibility
Your fifth goal is to test the interfaces that make the K3 platform useful for embedded and AI work. Try the M.2 Key-M NVMe slot, the M.2 Key-B cellular slot, the 10GbE SFP+ path, and the USB-C display or data ports one by one. If you are using the CoM260, move the module onto a carrier board that matches your target application, such as a Jetson Orin Nano/NX-compatible carrier where supported by the vendor ecosystem.
After the base board is stable, boot one alternate OS to confirm compatibility. Ubuntu 26.04 is a good next check because the board is RVA23-compliant, and the article notes support for OpenHarmony 6.0, OpenKylin 2.0, Deepin 25, and Fedora as well. Keep the first alternate boot simple: verify console, networking, and storage before trying graphics or AI workloads.
Verification: you should be able to boot at least one alternate OS and confirm that storage and networking still work as expected.
Common mistakes
- Using the wrong power input for the kit. Fix: confirm whether your unit expects 12V DC, USB-C PD, or a carrier-board supply before first boot.
- Skipping thermal hardware. Fix: install the heatsink and fan before long boot tests, especially if you plan to stress CPU, GPU, or AI blocks.
- Assuming all images are interchangeable. Fix: use the image built for your exact board or module, because UFS, NVMe, and carrier-board layouts can differ.
| Metric | Before/Baseline | After/Result |
|---|---|---|
| AI performance | Not available on typical SBC boot-only setups | Up to 60 TOPS INT4 on the K3 platform |
| Memory | Common SBC configs often stop at 8GB or 16GB | Up to 32GB LPDDR5 at 6400 MT/s |
| Storage | microSD-only development flow | Up to 256GB UFS 2.2 plus PCIe Gen3 x4 NVMe |
What's next
Once the board boots reliably, move on to workload testing: GPU and VPU validation, AI inference, virtualization with RV Hypervisor 1.0, and carrier-board integration for robotics or industrial I/O. That is where the K3 platform’s RISC-V, networking, and acceleration features start to matter.
// Related Articles
- [IND]
Vector databases will reshape financial search, not replace core syst…
- [IND]
Milvus 3.0 adds lake-native vector search
- [IND]
Google’s Q2 2026 results prove AI spend is now the story
- [IND]
AI regulation in India is now a business risk
- [IND]
Europe should standardise the AI Act through harmonised technical rul…
- [IND]
AMD and Anthropic’s 2GW deal reshapes AI supply